
How to setup event tracking in Google Analytics and Tag Manager
You can monitor and analyse the impact of Yonder conversations, such as impact on booking conversion, by tracking events in Google Analytics. Yonder sends Custom Events to whenever a conversation starts or someone leaves an email (which may lead to an offline transaction). This article describes how to set it up.
TLDR (Summary):
- Custom Events startConversation and emailGiven are automatically triggered for every customer interaction with Yonder.
- Receive events direct to your Google Analytics account: You must have the gtag.js script loaded on your website, which was by default 2018 onwards. Some CMS websites which allow custom insertion of the script may have gtag.js off by default. See this article for more information.
- Receive events to Google Analytics via Google Tag Manager: Set up a trigger which fires when a Custom Event 'Yonder interaction' is triggered, set-up a variable for 'user events', and set-up a tag to send this to Google Analytics.
Learn more and see a step by step guide below...
About custom events
Yonder sends events to Google Analytics/Tag Manager for certain interactions with Yonder, this is on by default for every Yonder customer. An event is triggered whenever a website visitor:
- Has a conversation. This event is named startConversation.
- If a website visitor leaves their email address, which typically means they need help and it often leads to an offline transaction or conversion. This event is named emailGiven.
This means there might be 2 events triggered for a single website visitor, for most Yonder customers around 5 - 30% of website visitors leave their email requiring help.
For the techies: we're sending several events so it's easy to integrate depending on your set-up: analytics.js, gtag.js and dataLayer events.
There are two ways to get events into your Google Analytics account...
1. Setup event tracking directly in Google Analytics
Ensure the global site tag (gtag.js) is installed on the header of your website pages. This is a feature released by Google at the end of 2017, with the goal of making event tracking a lot easier and more universal. If you've copied directly from Google Analytics "Install tracking code" page from 2018 onwards it's likely you've installed this. Prior to 2018 it's unlikely you're using this type of site tag and using the analytics.js tag instead.
How to find events:
Go to Behaviour
Go to Events Overview
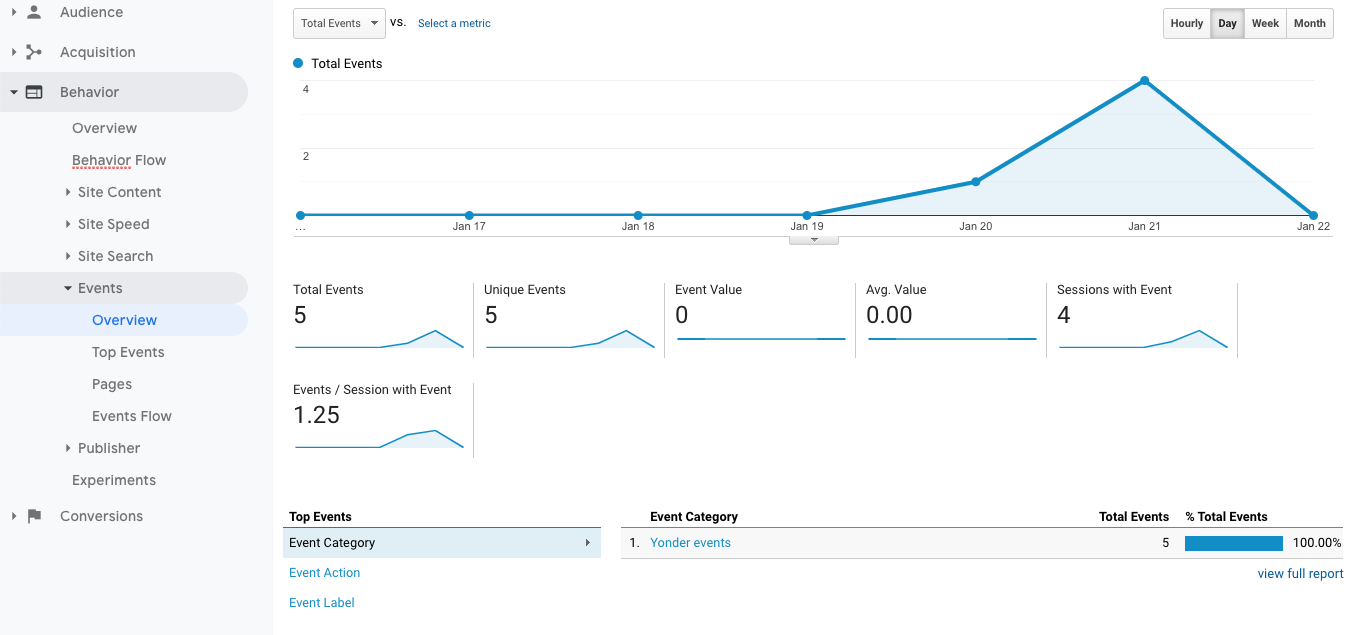
You'll see Event Category by default, named "Yonder interaction". Click Event Action to see the two types of events triggered - startConversation and emailGiven.

How to set-up Google Analytics to track events:
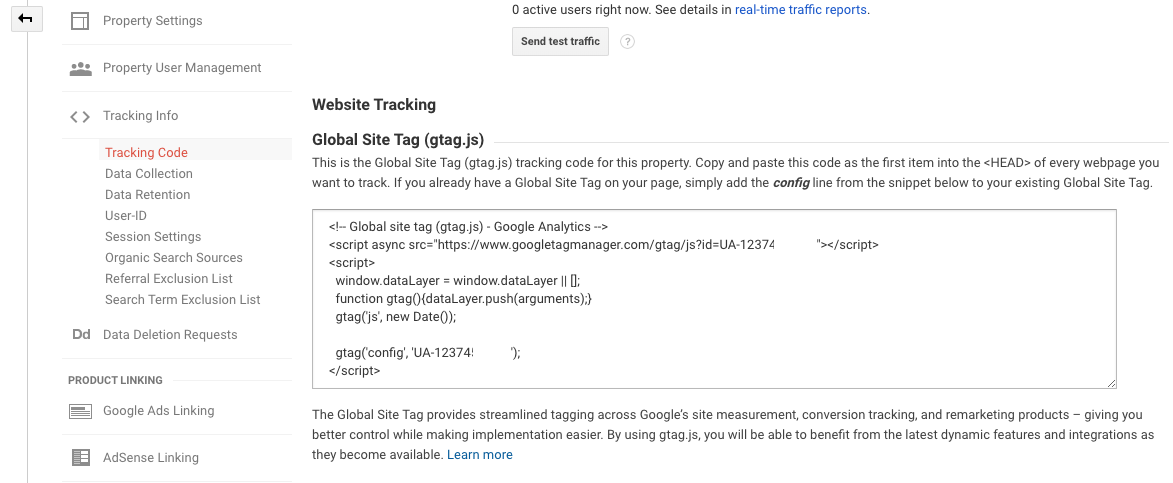
To set-up Google Analytics to automatically pull in events, copy the latest site tag from your Google Analytics account:
Go to Admin
Go to Property.
Click on Tracking Code
Copy the Global Site Tag and paste it into the header of your website
Publish the website and Yonder events will automatically start tracking.
2. Set up event tracking via tags in Google Tag Manager
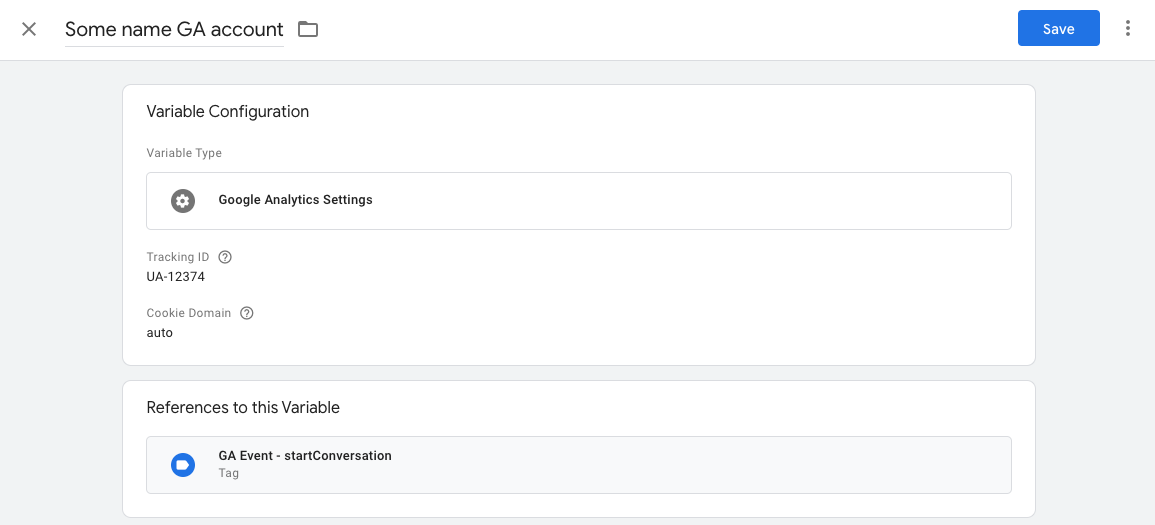
Set-up your Google Analytics account as a variable
Setting up your Google Analytics as a variable will be used to tell Tag Manager which Google Analytics account to send events you will soon create. If you've been using Tag Manager already you're probably doing this, so skip this step.
- Go to Variable
- Name it something similar to your Google Analytics account name
- Create a New User-Defined Variable
- Variable Type - Google Analytics Settings
- Tracking ID - Copy and Paste this from you Google Analytics account (find in the Admin / Property / Tracking Info / Tracking Code page)
- Save
Create a trigger for each Yonder Event
Let's create a trigger which will fire whenever an event is pushed by Yonder
- Select Triggers
- New
- Create a Name for this trigger. We suggest Yonder Event Trigger
- Choose a trigger type - Select Custom Event under the Other category.
- Event name = Yonder interaction
- Tick Regex ON.
- This trigger fires on - All Custom Events
- Save

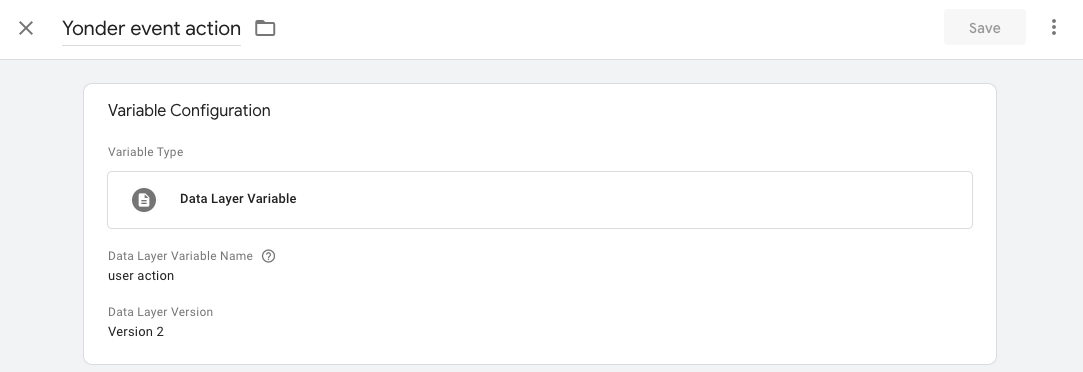
Create a variable to pass the event name
Creating a variable enables you to pass to the tag the name of the event that came through, either startConversation or emailGiven
- Select Variable
- New
- Create a Name for this trigger. We suggest Yonder event action
- Select Variable Type - Data Layer Variable
- Data Layer Variable name = user action. Ensure you accurately spell this.
- Save
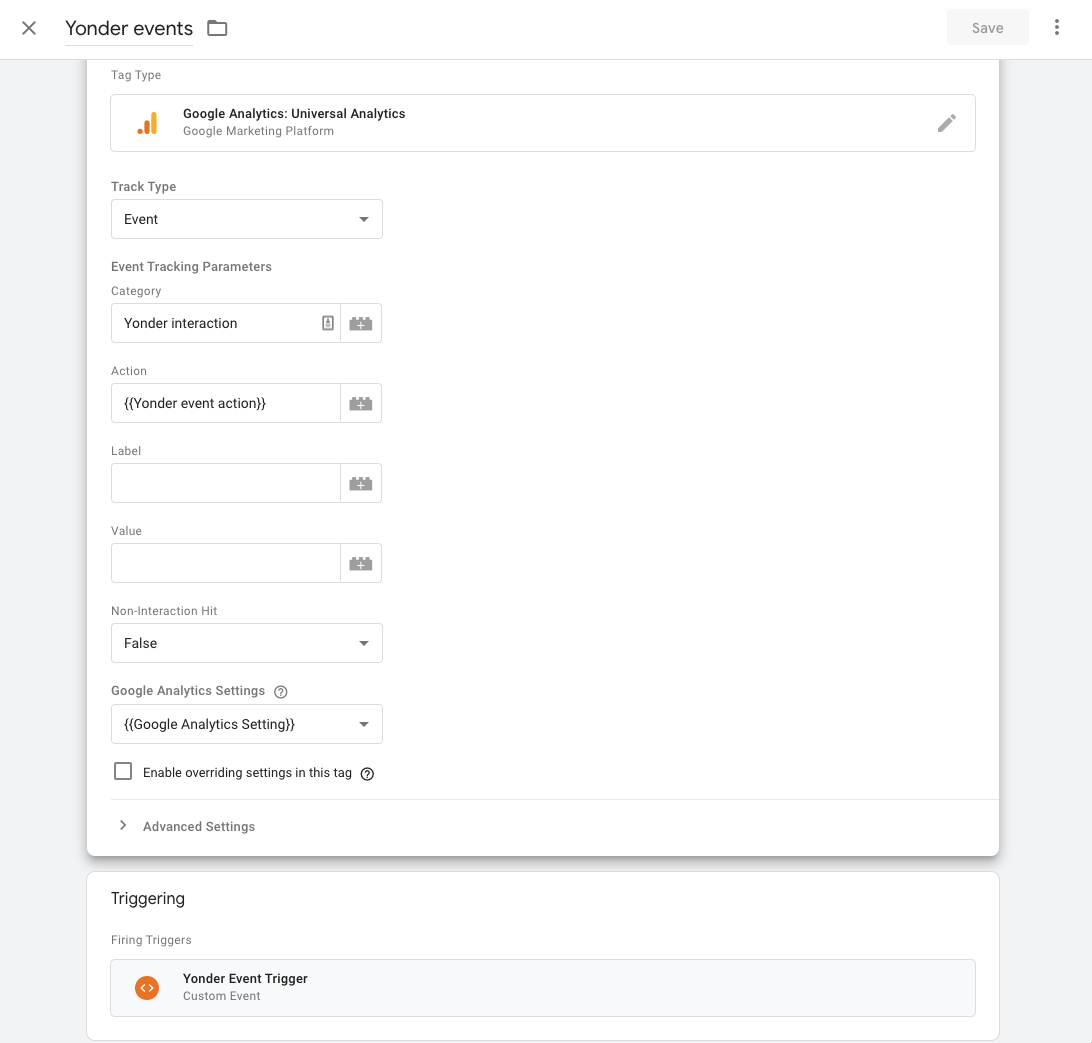
Create a tag
Creating a tag means you tell Google Tag Manager to send events to your desired Google Analytic account whenever it's triggered.
- Select Tags
- New
- Create a Name for this trigger. We suggest Yonder events
- Select Tag Type - Google Analytics: Universal Analytics
- Track Type - Event
- Category - Give this a name like Yonder interaction
- Action - Select from the list
- Google Analytics Settings - Select a variable with the name you created a few steps above.
- Choose a trigger - Select the Yonder Event Trigger trigger you earlier created.
Publish
Publish these settings to start the event tracking and sending to Google Analytics.
When you go into your Google Analytics account, to Behaviour / Events / Overview you will see events with category you named above, and clicking on actions you'll see the two events you created.

Segment your Google Sessions by "Yonder interactions" and analyse conversion. View article.
How to ensure you exclude Yonder as a referral source for goals, view article.